LPKF 3.0 tutorial for hp-gl files
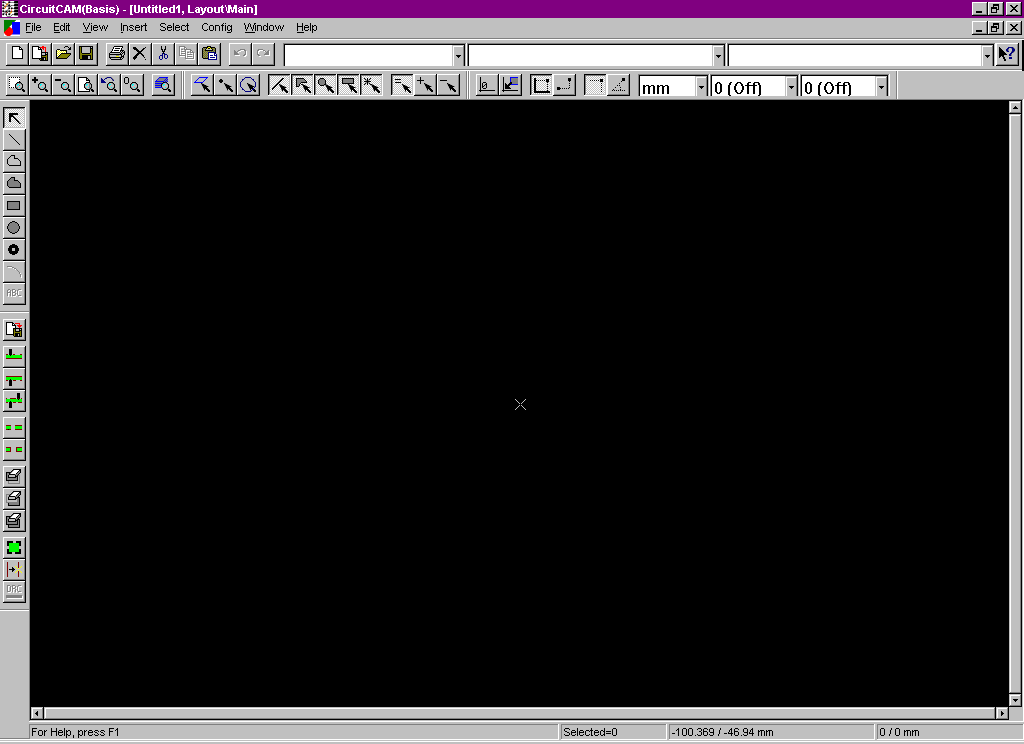
LPKF opens to this window; you may want to become familiar with the tool bar.
Figure 1
Importing files
- Select import from file menu or tool bar.
- Select only one .hpg file to import and click open.
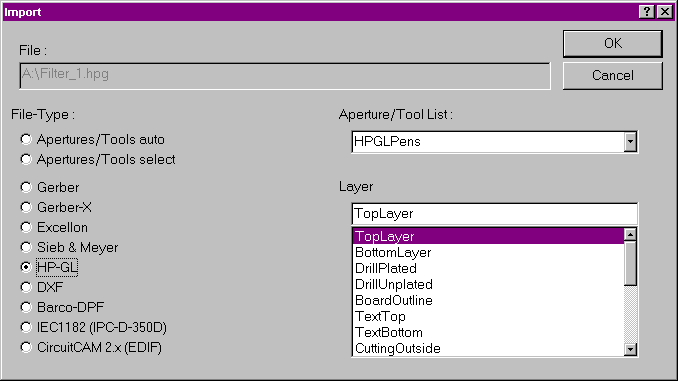 Figure 2 Then this window should open
Check to make sure that the file-Type is HP-GL, Aperture/tool list: is HPGL pens, and layer: is TopLayer, then click ok.
Check the dimensions
- Select the corner you wish to make the zero point by clicking near it.
The selected corner will have a X on it as below
Figure 3
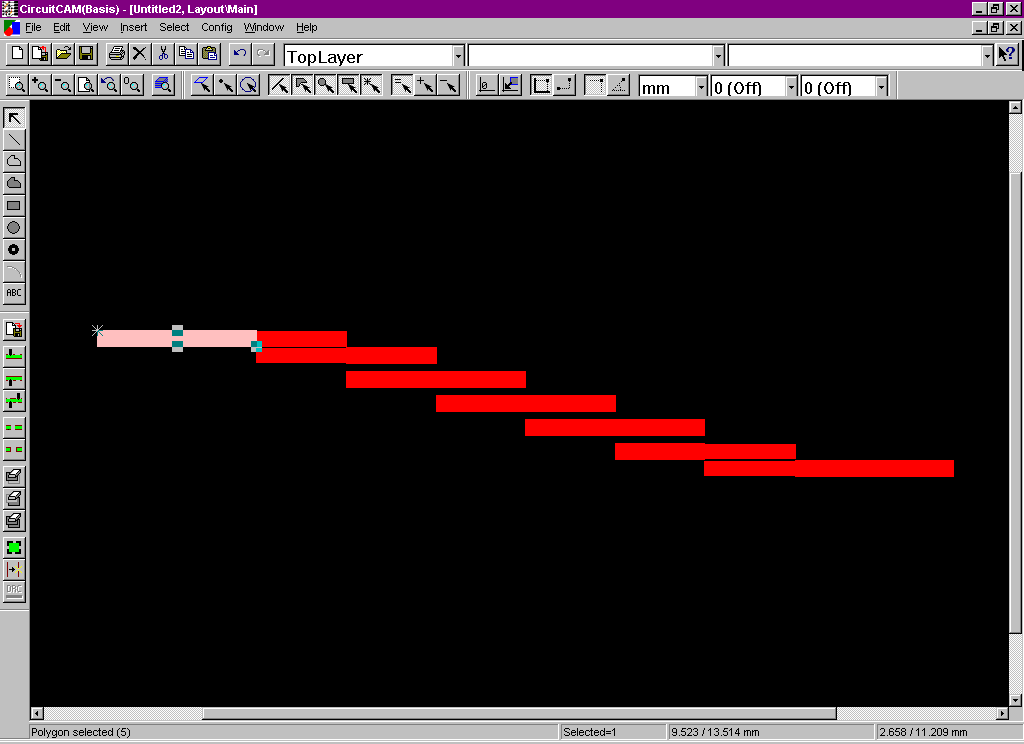
- Select set zero point from edit menu or tool bar.
- Select the point that you wish to measure the distance from the zero point by clicking near it.
In the lower right corner there are two coordinates the one to the left is where the cursor arrow is, and the one to the right is where the X is.
- If the length is wrong the scale factor needs to be changed. The equation to get the correct scale factor = (desired length / current length) current scale factor. To find the scale factor click on config, then format configuration, then HP-GL-pen list. The window that opens should look like the one on the following page. The scale factor is under the scale column. To close the window click on word Close on the tool bar.
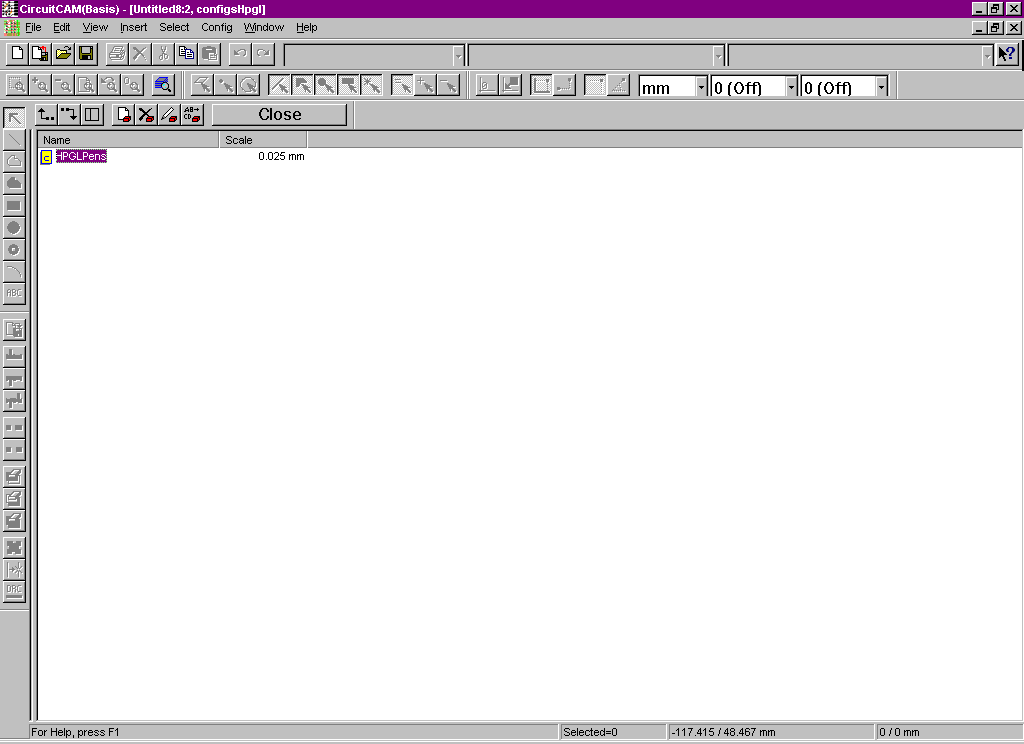 Figure 4
Changing the scale factor
- Calculate the correct scale factor as explained in step 4 of check the dimensions.
- Close the current project without saving it and open a new one like the one in figure 1.
 Get to the window in figure 4 as explained in step 4 of check the dimensions. High light HP-GL pens like it is figure 4 by clicking on it once. Then click on this icon in the tool bar.
- Enter the correct scale factor in the unit field in window like figure 5. Then click ok.
- Close HP-GL pen list by clicking on the word close. Then import the file again. This process may need to be repeated a number of times to get the correct dimensions. Remember to calculate at new scale factor each time and change it before you import the file.
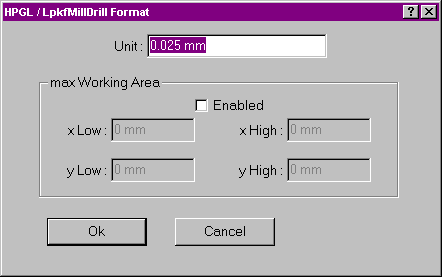 Figure 5
Making the board outline
- Make sure the no parts of the schematic are selected (selected parts are a different shade of color). If any parts are selected this process will change its layer.

Figure 6 layer tool type tool (shows which layer is being worked on)
- Change the 3 labeled fields in figure 6 to what they are in that figure.
- Select closed path from insert menu or the vertical tool bar.
- To make the boarder more exact push ctrl c on the key this allows to type in location of the cursur point this will need to be done for all four corners, the mouse is little to jumpy to be exact. The boarder should be about 3 trace line widths space away from the edges of the schematic, unless it needs to be cut flush for connection reasons.
Making holes
- Select unplated arbitrary hole from insert menu..
- Put 0.8 mm for the diameter of holes to the ground plain. If you need a different size hole, the only sizes we have are 0.8 mm, 1mm, 1.5 mm, 2.95 mm, and 3 mm.
- Place the hole where you need it.
Text
- Select text from insert menu, then click on top
- The layer field needs to be changed to toplayer. Texttop does not work. Text needs to be added before it is insulated.
- Write the text in the big open field. Do not write very much or make big letters, because the milling bits are expensive, so donít waste them on text that you will not be able to read after the copper is peeled off.
- Click on ok and place text.
Insulating
- Select insulate from the edit menu, do not select it from the toolbar.
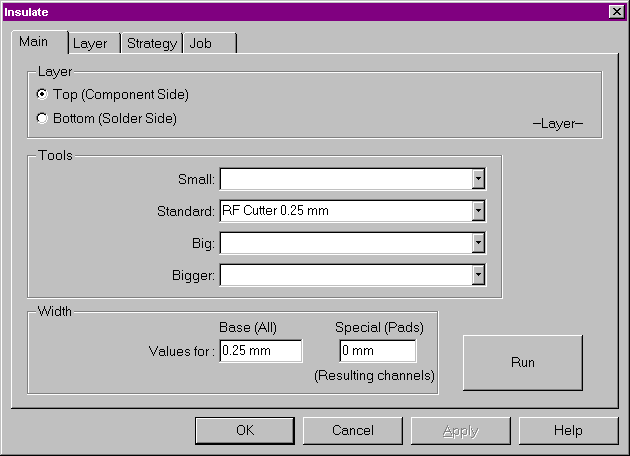
- The window in figure 7 should open, fill it out as it appears in figure 7. Then click on run.
Figure 7
Exporting
- Save the file.
- Select export from file menu or vertical tool bar. If you get a strange error message, it probably means
there is no room left on your disk. The file show on the directory list, but it will not be something that can be milled so get new disk or make room on the current one and export it again.


 Figure 2 Then this window should open
 Figure 4
 Figure 5
